参考文档
GetStarted Hello World In Java
快速入门 RabbitMQ 和一般的消息传递使用术语
生产者(发送消息) : Producing means nothing more than sending. A program that sends messages is a producer
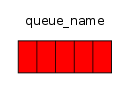
队列(消息缓冲区): A queue is the name for the post box in RabbitMQ. Although messages flow through RabbitMQ and your applications, they can only be stored inside a queue . A queue is only bound by the host’s memory & disk limits, it’s essentially a large message buffer. Many producers can send messages that go to one queue, and many consumers can try to receive data from one queue . This is how we represent a queue:
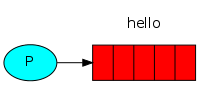
消费者(接收消息): Consuming has a similar meaning to receiving. A consumer is a program that mostly waits to receive messages:
三者不一定部署在同一个主机上,应用程序既可以是生产者又可以是消费者
P 是生产者,C 是消费者。中间是一个队列,代表消费者保存的消息缓冲区。
发送消息
引入依赖
1 2 3 4 5 <dependency > <groupId > com.rabbitmq</groupId > <artifactId > amqp-client</artifactId > <version > 5.8.0</version > </dependency >
创建连接
1
2
3
4
5
ConnectionFactory factory = new ConnectionFactory ();factory.setHost("localhost" ); try (Connection connection = factory.newConnection(); Channel channel = connection.createChannel()) { }
create a channel , which is where most of the API for getting things done resides
要发送消息,必须声明一个队列 供我们发送到该队列;然后,可以向该队列发布消息
1
2
3
4
channel.queueDeclare(QUEUE_NAME, false , false , false , null ); String message = "Hello World!" ;channel.basicPublish("" , QUEUE_NAME, null , message.getBytes()); System.out.println(" [x] Sent '" + message + "'" );
声明队列是幂等的,只有当队列不存在时才会创建。信息内容是一个字节数组,因此可以在其中任意编码
完整代码
1
2
3
4
5
6
7
8
9
10
11
12
13
14
15
16
17
18
19
20
21
22
public class Send { private final static String QUEUE_NAME = "hello" ; public static void main (String[] args) { ConnectionFactory factory = new ConnectionFactory (); factory.setHost("localhost" ); try (Connection connection = factory.newConnection(); Channel channel = connection.createChannel()) { channel.queueDeclare(QUEUE_NAME, false , false , false , null ); String message = "Hello World!" ; channel.basicPublish("" , QUEUE_NAME, null , message.getBytes()); System.out.println(" [x] Sent '" + message + "'" ); } catch (Exception e) { } } }
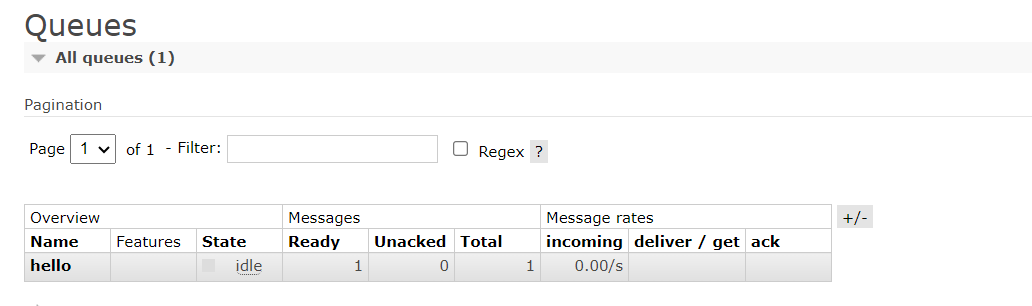
启动MQ服务,运行main方法,访问http://localhost:15672/#/查看结果
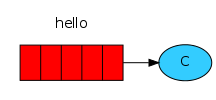
接受消息 消费者会监听来自 RabbitMQ 的消息,因此与只发布一条消息的发布者不同,我们将保持消费者运行以监听消息并打印出来。
设置与发布程序相同;我们打开一个连接和一个通道,并声明我们要从哪个队列消费。请注意,这与发送发布到的队列一致
1
2
3
4
5
6
7
8
9
10
11
12
13
14
15
16
17
18
19
20
public class Recv { private final static String QUEUE_NAME = "hello" ; public static void main (String[] argv) throws Exception { ConnectionFactory factory = new ConnectionFactory (); factory.setHost("localhost" ); Connection connection = factory.newConnection(); Channel channel = connection.createChannel(); channel.queueDeclare(QUEUE_NAME, false , false , false , null ); System.out.println(" [*] Waiting for messages. To exit press CTRL+C" ); } }
请注意,我们在这里也声明了队列。因为我们可能会在发布者之前启动消费者,所以我们要在尝试从队列中消费消息之前确保队列存在。
DeliverCallback 子类的作用
额外的 DeliverCallback 接口用于缓冲服务器推送给我们的信息。要告诉服务器将队列中的消息传递给我们。由于它将 以异步方式 向我们推送消息,因此我们以对象的形式提供一个回调,该对象将缓冲消息直到我们准备好使用它们。
1
2
3
4
5
DeliverCallback deliverCallback = (consumerTag, delivery) -> { String message = new String (delivery.getBody(), "UTF-8" ); System.out.println(" [x] Received '" + message + "'" ); }; channel.basicConsume(QUEUE_NAME, true , deliverCallback, consumerTag -> { });
完整代码
1
2
3
4
5
6
7
8
9
10
11
12
13
14
15
16
17
18
19
20
21
22
23
24
25
26
27
28
29
30
31
public class Recv { private final static String QUEUE_NAME = "hello" ; public static void main (String[] argv) throws Exception { ConnectionFactory factory = new ConnectionFactory (); factory.setHost("localhost" ); Connection connection = factory.newConnection(); Channel channel = connection.createChannel(); channel.queueDeclare(QUEUE_NAME, false , false , false , null ); System.out.println(" [*] Waiting for messages. To exit press CTRL+C" ); DeliverCallback deliverCallback = (consumerTag, delivery) -> { String message = new String (delivery.getBody(), StandardCharsets.UTF_8); System.out.println(" [x] Received '" + message + "'" ); }; channel.basicConsume(QUEUE_NAME, true , deliverCallback, consumerTag -> { }); } } [*] Waiting for messages. To exit press CTRL+C [x] Received 'Hello World!'
Listing queues
You may wish to see what queues RabbitMQ has and how many messages are in them. You can do it (as a privileged user) using the rabbitmqctl tool:
1 2 3 4 sudo rabbitmqctl list_queues rabbitmqctl.bat list_queues
Spring AMQP 我们将使用 Spring Boot 来引导和配置 Spring AMQP 项目,代码仓库链接
创建父工程和子工程HelloWorld,创建MQ配置类RabbitMQConfig
1
2
3
4
5
6
7
8
9
10
11
spring: rabbitmq: port: 5672 host: localhost username: guest password: guest logging: level: org: ERROR server: port: 8080
1 2 3 4 5 6 7 8 9 10 11 12 13 14 15 16 17 18 19 20 <dependencies > <dependency > <groupId > org.springframework.boot</groupId > <artifactId > spring-boot-starter</artifactId > <exclusions > <exclusion > <groupId > org.springframework.boot</groupId > <artifactId > spring-boot-starter-logging</artifactId > </exclusion > </exclusions > </dependency > <dependency > <groupId > org.springframework.boot</groupId > <artifactId > spring-boot-starter-web</artifactId > </dependency > <dependency > <groupId > org.springframework.boot</groupId > <artifactId > spring-boot-starter-amqp</artifactId > </dependency > </dependencies >
1
2
3
4
5
6
7
8
9
@Configuration public class RabbitMQConfig { @Bean public Queue hello () { return new Queue ("hello" ); } }
发送消息
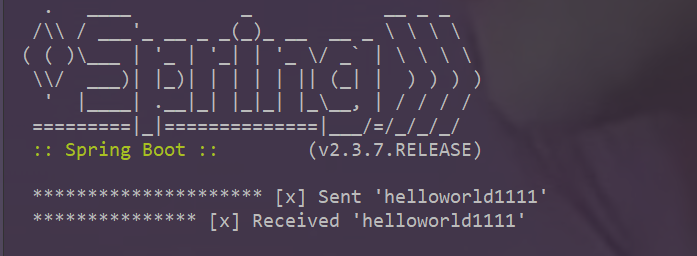
1
2
3
4
5
6
7
8
9
10
11
12
13
14
15
16
17
18
19
20
21
22
23
24
25
public interface HelloWorldSenderService { void send (String message) ; } @Service public class HelloWorldSenderServiceImpl implements HelloWorldSenderService { @Autowired private RabbitTemplate rabbitTemplate; @Autowired private Queue queue; @Override public void send (String message) { rabbitTemplate.convertAndSend(queue.getName(), message); System.out.println(" ********************* [x] Sent '" + message + "'" ); } }
1
2
3
4
5
6
7
8
9
10
11
12
13
14
@RestController @RequestMapping("/amqp") public class HelloWorldSenderController { @Autowired private HelloWorldSenderService senderService; @GetMapping("/send") public String send (@RequestParam String message) { senderService.send(message); return "Send Success" ; } }
接收消息
1
2
3
4
5
6
7
8
@Component public class HelloWorldReceiver { @RabbitListener(queues = "hello") public void receive (String in) { System.out.println(" *************** [x] Received '" + in + "'" ); } }
使用http client发送请求
1
2
# HelloWorld 测试 GET { { hello_world_host} } /amqp/send?message=helloworld1111